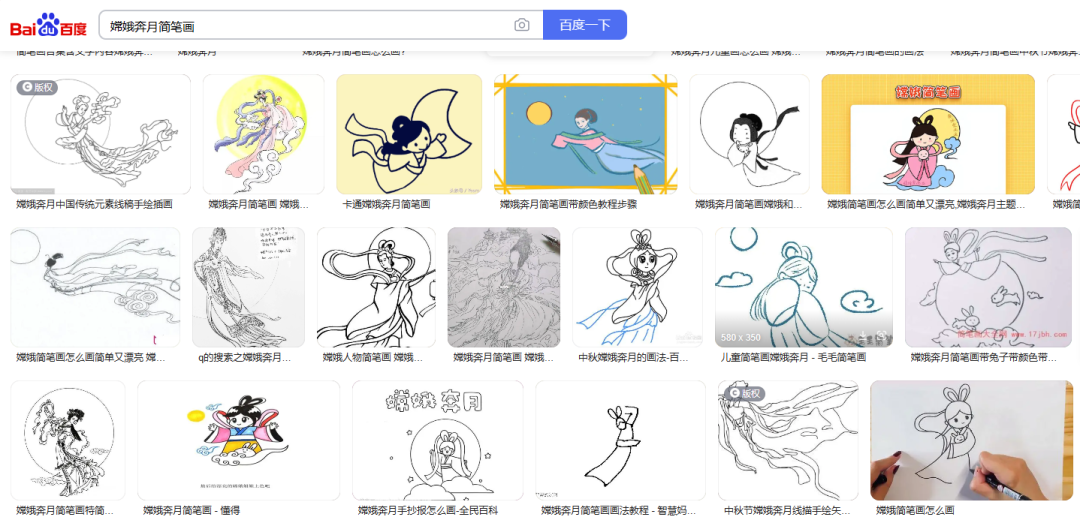
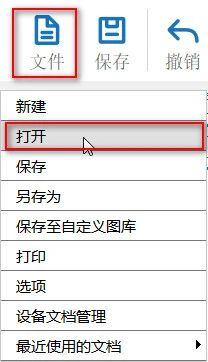
1) Enter the keyword "Chang'e Flying to the Moon Sketches" in "Baidu Images", select your favorite image and save it; Click on 'File' in the 'Function Area' above, and then click on it
【 Open 】, double-click to open the saved simple stroke image of Chang'e flying to the moon, as shown in the following figure:, as shown in the following figure:
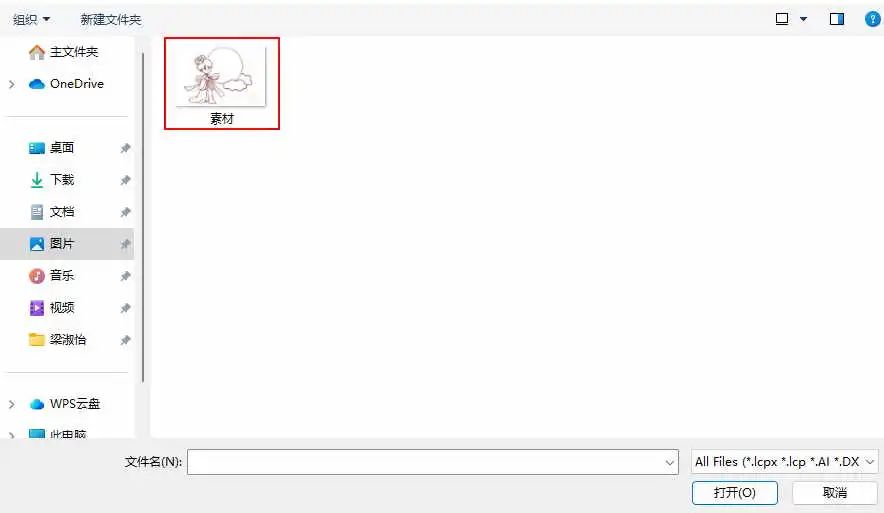
(2) Click on the image of Chang'e flying to the moon with the left mouse button, click on 'Outline Drawing', adjust the parameters, and obtain the line drawing of Chang'e flying to the moon, as shown in the following figure:
(3) Left click on the left toolbar of the mouse and select 'Rectangle'. Draw a rectangle and set its length and width to“120、120”;
Left click on the left toolbar of the mouse and select 'Ellipse' to draw a perfect circle. Set the length and width to“20、20”;
Copy and paste the regular circles twice, place the three circles in the appropriate position, merge them, and obtain a cloud shaped pattern;
Move the cloud pattern to align with the top left corner of the rectangle, and then align the cloud patternxcoordinates-15,ycoordinates-8As shown in the following figure:

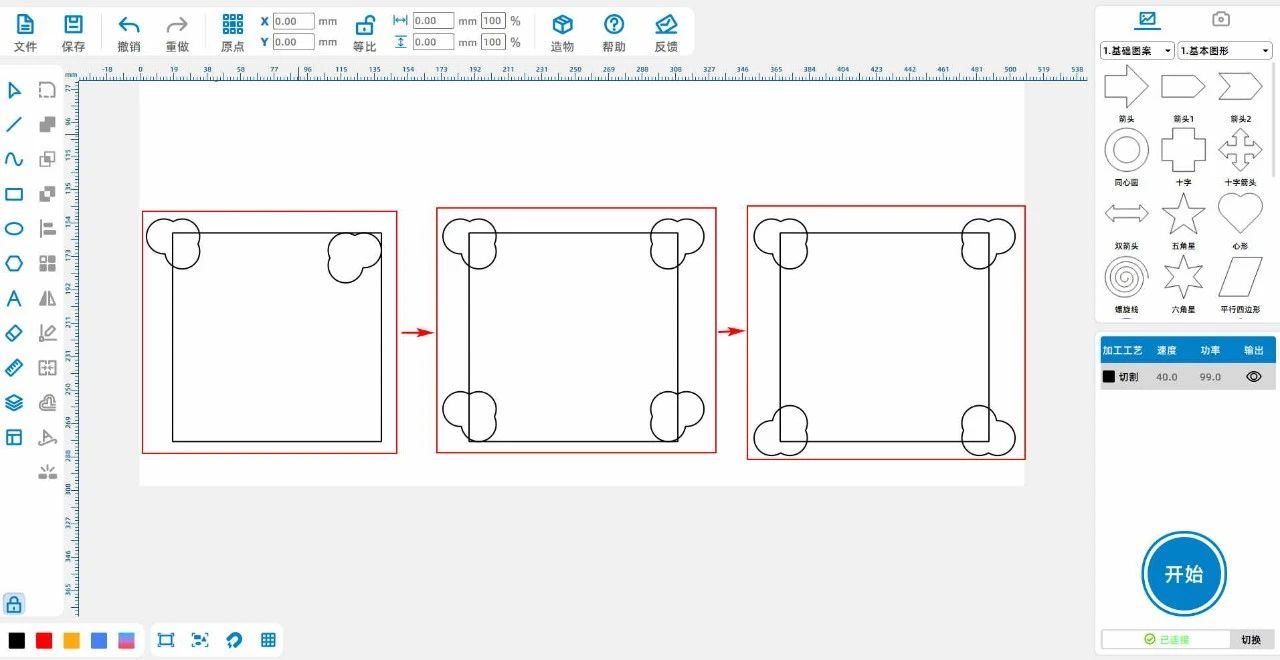
(4) Select the cloud pattern with the left mouse button, copy and paste it once, and move it to the upper right corner of the rectangle while horizontally mirroring it. Finally, copy and paste the cloud patternxcoordinates-15,ycoordinates+8;
Select the two cloud patterns above the rectangle, copy and paste them once, move them directly below the original cloud pattern, align them with the bottom of the rectangle, and then separate the two final cloud patterns
Perform a vertical mirror image of the cloud pattern once, and finally merge the cloud pattern in the bottom left cornerycoordinates+8The cloud pattern in the bottom right cornerycoordinates+8As shown in the following figure:
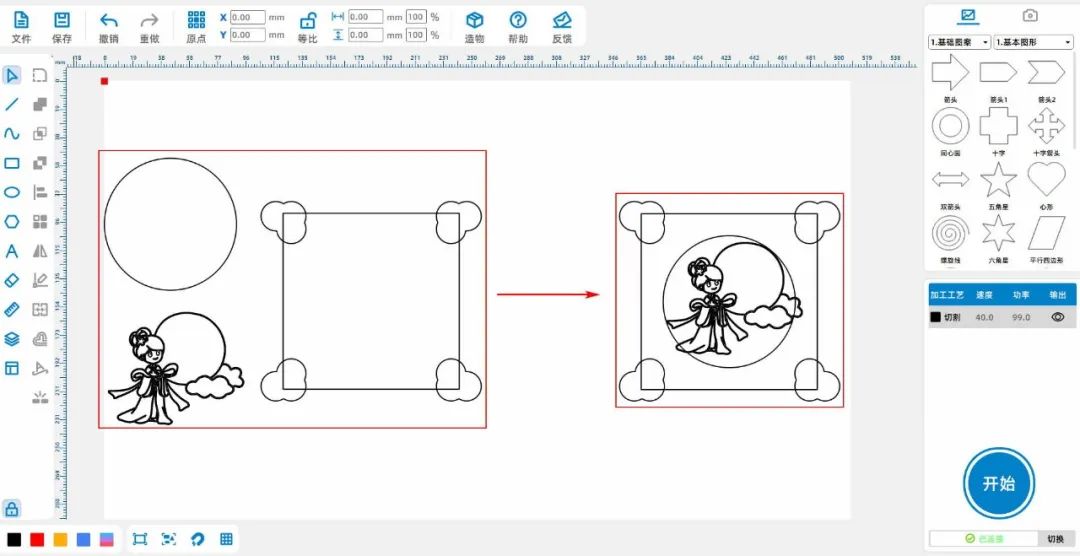
(5)Left click on the left toolbar of the mouse and select 'Ellipse' to draw a perfect circle. Set the length and width to“90、90”;
Place the circle in the middle of the rectangle, and then place the pattern of Chang'e flying to the moon in the middle of the circle, as shown in the following figure:
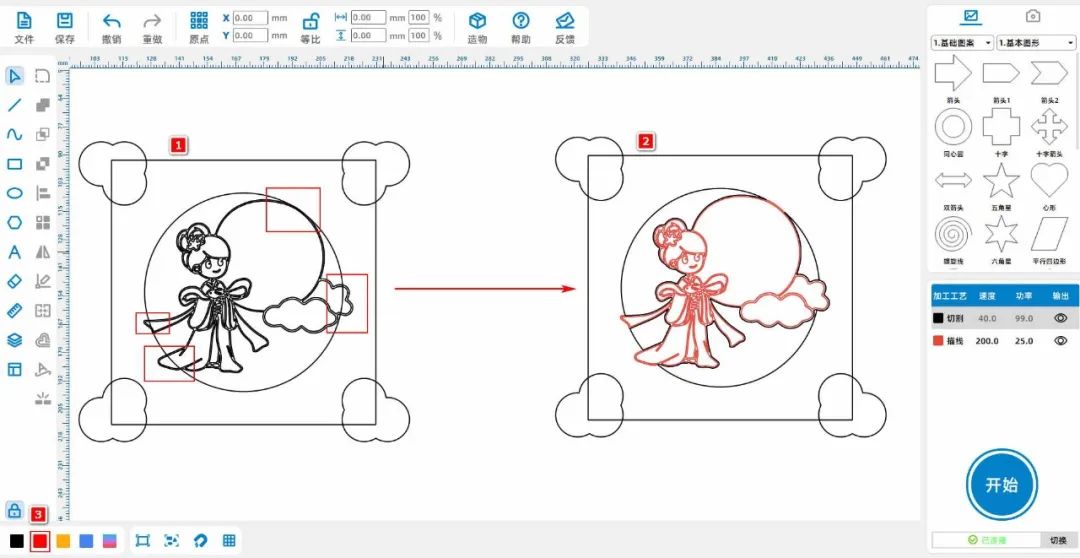
(6)Click the left mouse button on the left toolbar to use the 'Break Line Segment' function on the eraser. Click on the intersection between the 'Chang'e Flying to the Moon' and the 'Straight Circle' within the four small rectangles on the left
Cut off and use a combination curve to connect the outer circle of Chang'e Flying to the Moon and a regular circle;
Select all the internal lines of 'Chang'e Flying to the Moon', left click on the layer panel in the lower left corner of the mouse to change the layer to red, as shown in the following figure:
(7)Left click on the left toolbar of the mouse and select 'Rectangle' to draw a rectangle1、2Set both width and height to“65、5”Place them in the center of the upper and lower inner sides of the large rectangle;
Left click on the left toolbar of the mouse and select 'Rectangle' to draw a rectangle3、4Set both width and height to“10、3”, transform the rectangle3Place it in a rectangle1Align the bottom center of the rectangle4Put it in
rectangle2Align the top center;
Transform the rectangle1、3Merge, rectangle2、4Combine as shown in the figure below, and then use the pattern obtained from the union to subtract from the large rectangle separately

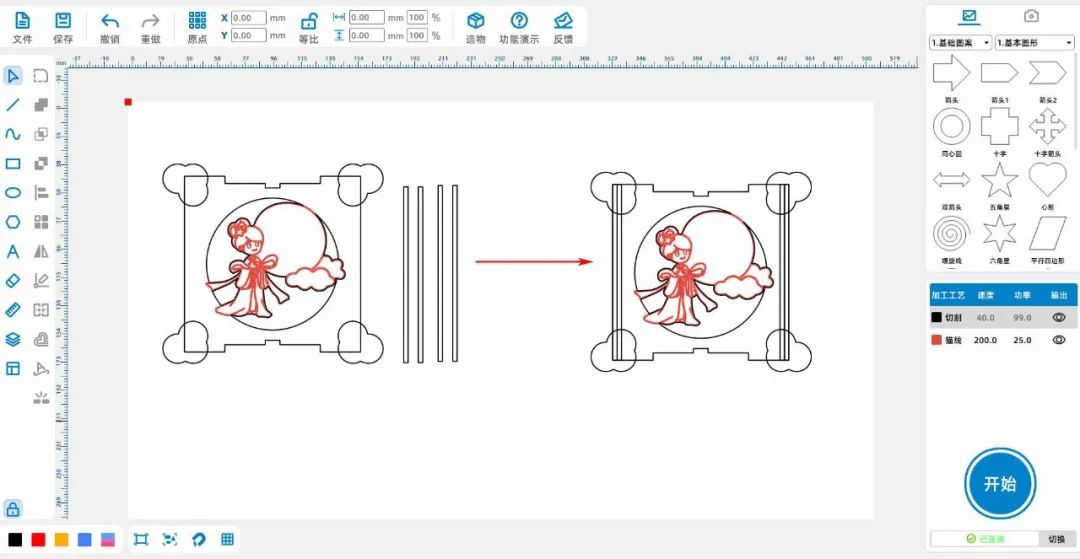
(8)Left click on the left toolbar of the mouse and select 'Rectangle'. Draw four small rectangles and set their width and height to“3、120”Place them in pairs inside the left and right sides of the large rectangle
Side, as shown in the following figure:
(9)Left click on the image in the upper right corner of the 'Gallery'【2.Decorative border, select Dragon Totem1】Select the border in the upper left corner1Align with the top left corner of the large rectangle, and
When placing the border1ofxcoordinates+8,ycoordinates+8;Move the border1Copy and paste once to obtain the border2Move to the upper right corner of the large rectangle and simultaneously move itxcoordinates-8,ycoordinates
+8;Select border1、2Copy and paste it once to obtain the border3、4Perform a vertical mirror and then move it to the border1、2Directly below and connected to the Great Wall
Align the lower inner side of the shape, and finally align the border3、4ofycoordinates-8As shown in the following figure:

(10)Right click and select the cloud pattern of the large rectangle and its four corners, merge them once, then delete the rightmost and leftmost small rectangles inside the large rectangle, and remove the remaining two
Change the height of the small rectangle to60;Right click to select all patterns and copy and paste them once;Move the two small rectangles inside the left pattern to align with the top of the cloud pattern
Move the two small rectangles inside the pattern on the right to align with the lowest end of the cloud pattern, as shown in the following figure:
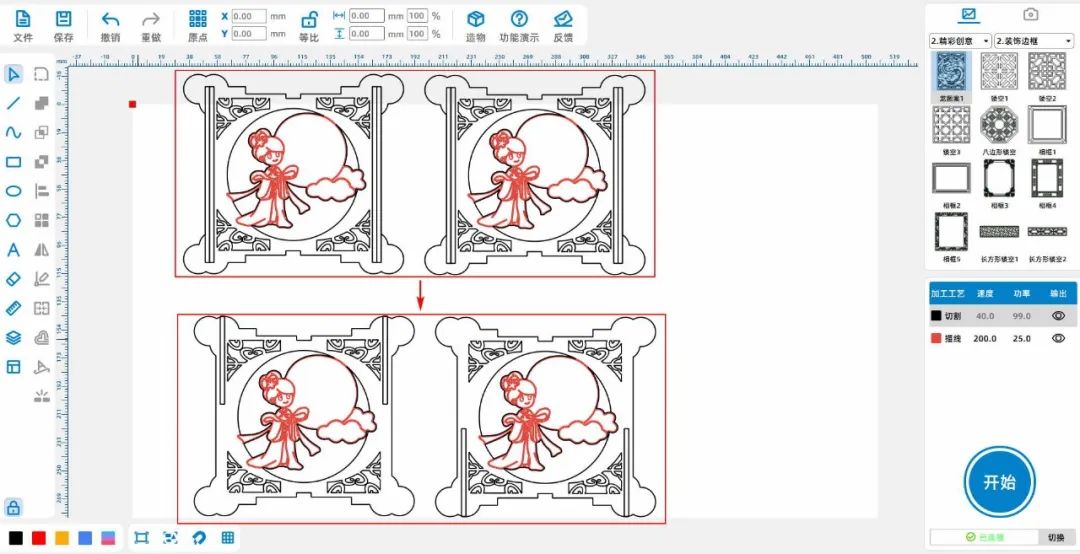
(11)Right click and select the cloud pattern of the large rectangle and its four corners, merge them once, then delete the rightmost and leftmost small rectangles inside the large rectangle, and remove the remaining two
Change the height of the small rectangle to60;Right click to select all patterns and copy and paste them once;Move the two small rectangles inside the left pattern to align with the top of the cloud pattern
Move the two small rectangles inside the pattern on the right to align with the lowest end of the cloud pattern, as shown in the following figure:
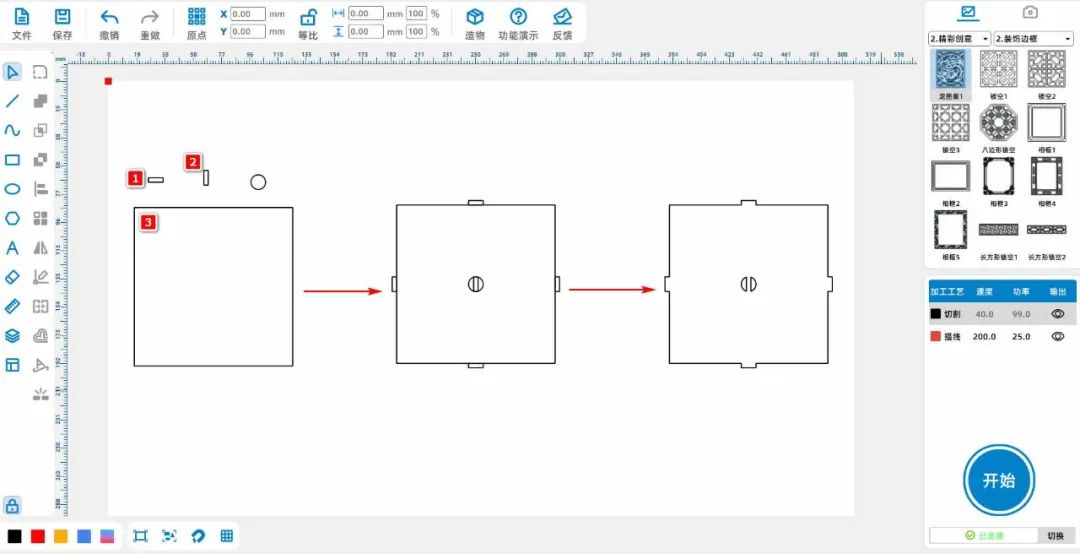
(12)Left click on the rectangle in the left toolbar and draw it3A rectangle, a rectangle1Width and height are“10、3”, rectangle2Width and height are“3、10”, rectangle3Width and height are“108、108”;
Left click on the left toolbar of the mouse and select 'Ellipse' to draw a perfect circle. Set the width and height to“10、10”;
Transform the rectangle1Move to rectangle3Align the rectangle in the center directly above and then align it1Copy and paste once, and move the resulting rectangle to the rectangle3Align the center directly below;
Transform the rectangle2Move to rectangle3Align the left side with the center, and then align the rectangle2Copy and paste once, and move the resulting rectangle to the rectangle3Align the right side in the center;
Transform the rectangle2Perform another copy and paste operation and move the resulting rectangle to the rectangle3At the same time, move the regular circle to the rectangle in the middle3In the middle;
Left click on the rectangle with the mouse button3Perform a difference set on the middle rectangle, and then select the rectangle3Perform a union with the four rectangles around it, as shown in the following figure:
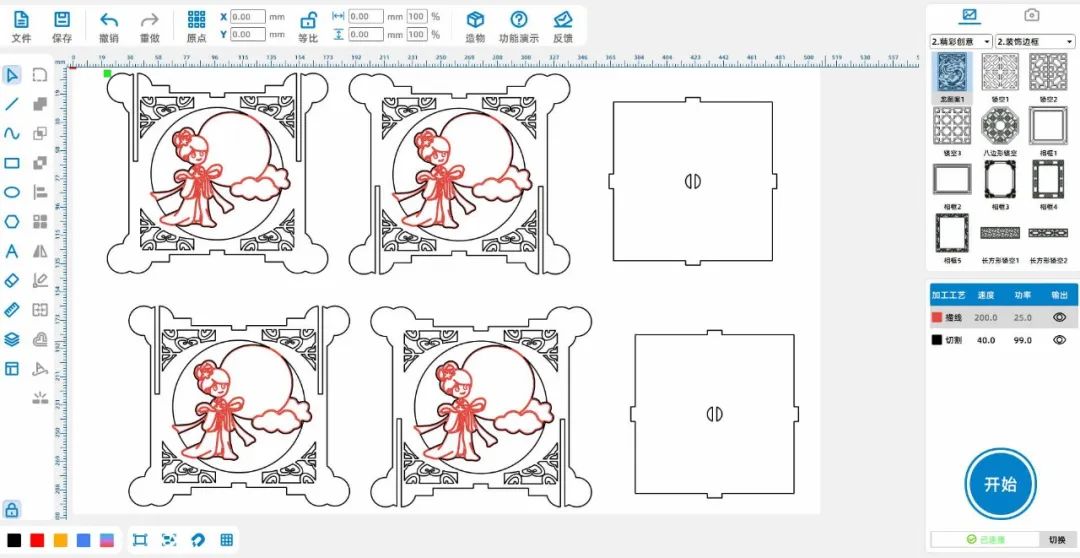
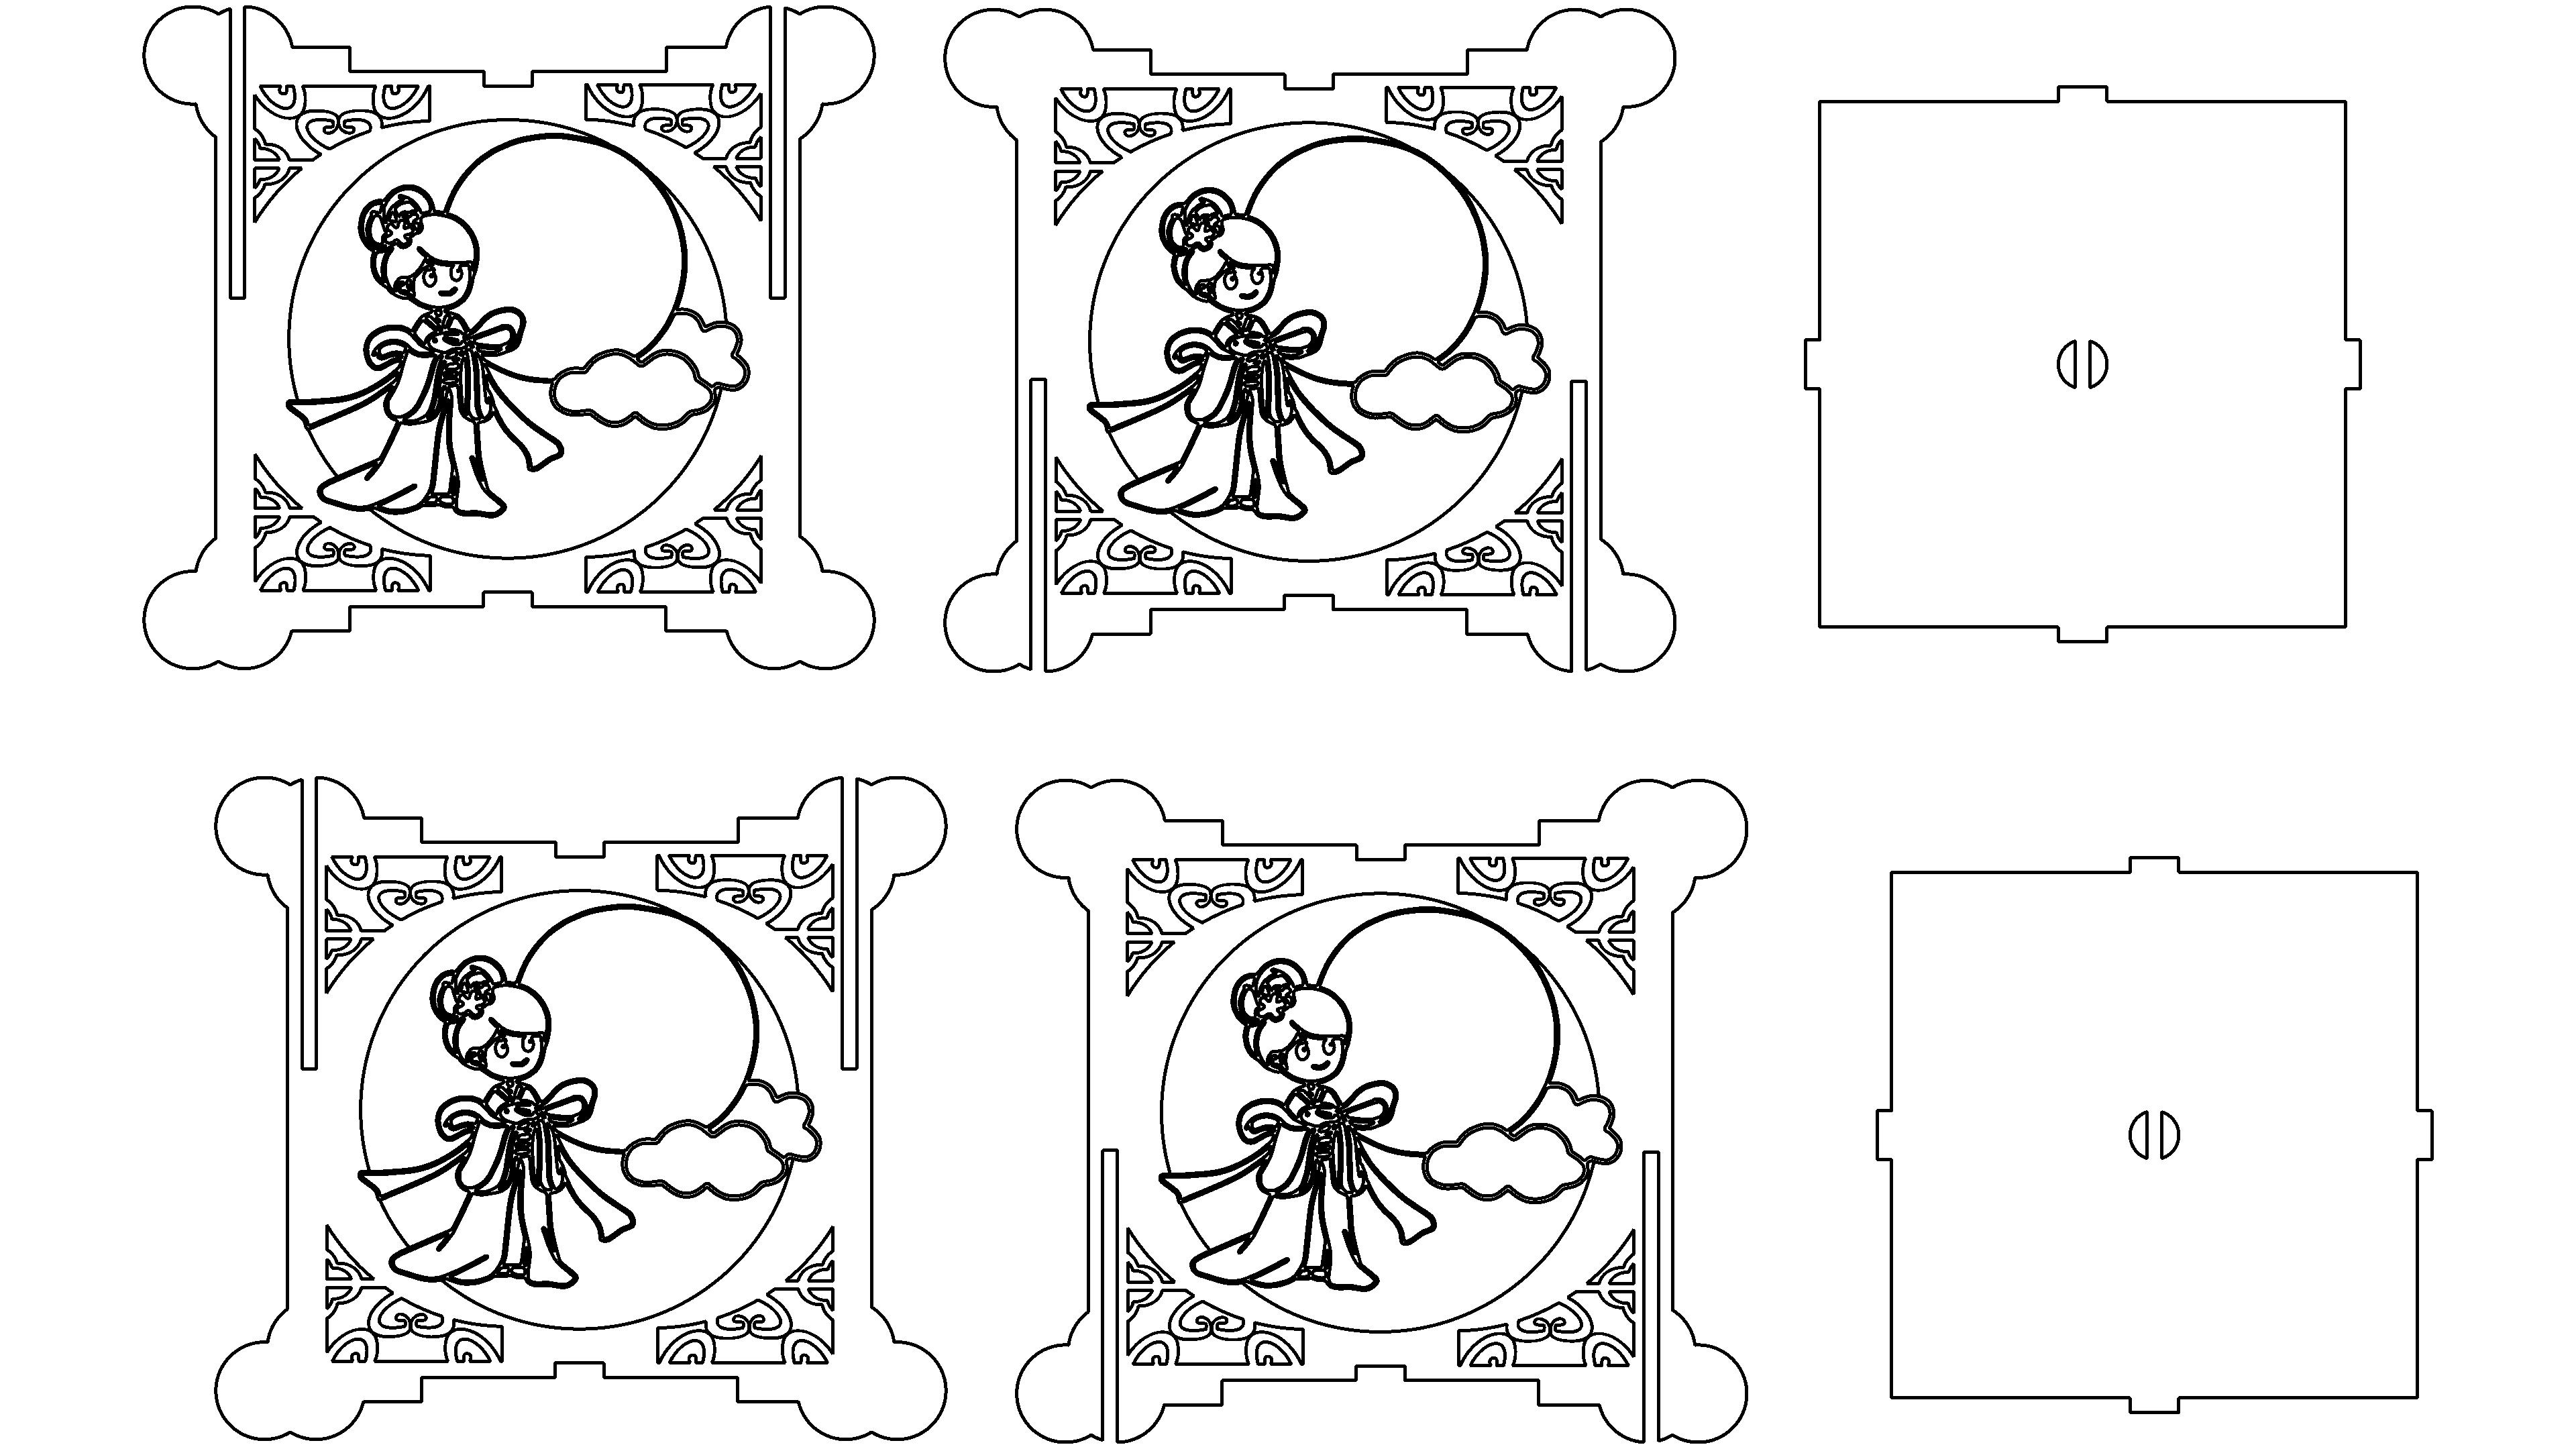
(13)Select all patterns with the left mouse button, copy and paste them once, and then use all the small rectangles inside the lantern to perform a difference set with the outer contour of the lantern to create a Mid Autumn Festival lantern
The complete drawings of the cage are shown in the following figure:
 English
 简体中文
简体中文
 繁體中文
繁體中文
 Français
 Español
 عربي ،
 русский язык
 Português
 Deutsch


laser3DSmart Manufacturing
2025-12-15 13:13
6666666666666666666
laser3DSmart Manufacturing
2025-12-15 13:14
666666666666666666666
18702529789
2025-11-18 08:53
6666666666666
WeChat users_91
2026-1-25 16:41
good