 English
 简体中文
简体中文
 繁體中文
繁體中文
 Français
 Español
 عربي ،
 русский язык
 Português
 Deutsch

drawing
old mobile phoneDIY-Holographic projection box design project
Drawing Information

Drawing video
Drawing Description
Project Introduction: In this era of rapid updates and replacements of smartphones, we often have idle old phones in our hands. Instead of letting them eat dust in drawers, it's better to use simple principles of physical optics——The Pearl Illusion (Pepper's Ghost)Transform them into a futuristic desktop3DHolographic projector.
Design concept: This project utilizes a laser cutting machine to process oak boards as the main supporting structure, creating a vintage picture frame or old-fashioned television texture; Use high transparency acrylic sheet to make the core refractive component. Place the old phone on top, and the screen will display through45The angle of acrylic reflection creates a three-dimensional suspended image in the air.
Key Features:
environment protection Give a second life to discarded mobile phones.
esthetics: The layered structure design of oak wood is not only a toy, but also an exquisite desktop decoration.
interaction: Combined with specific holographic video sources, it can display anime characters, sci-fi models, or flame effects.
drawing documents
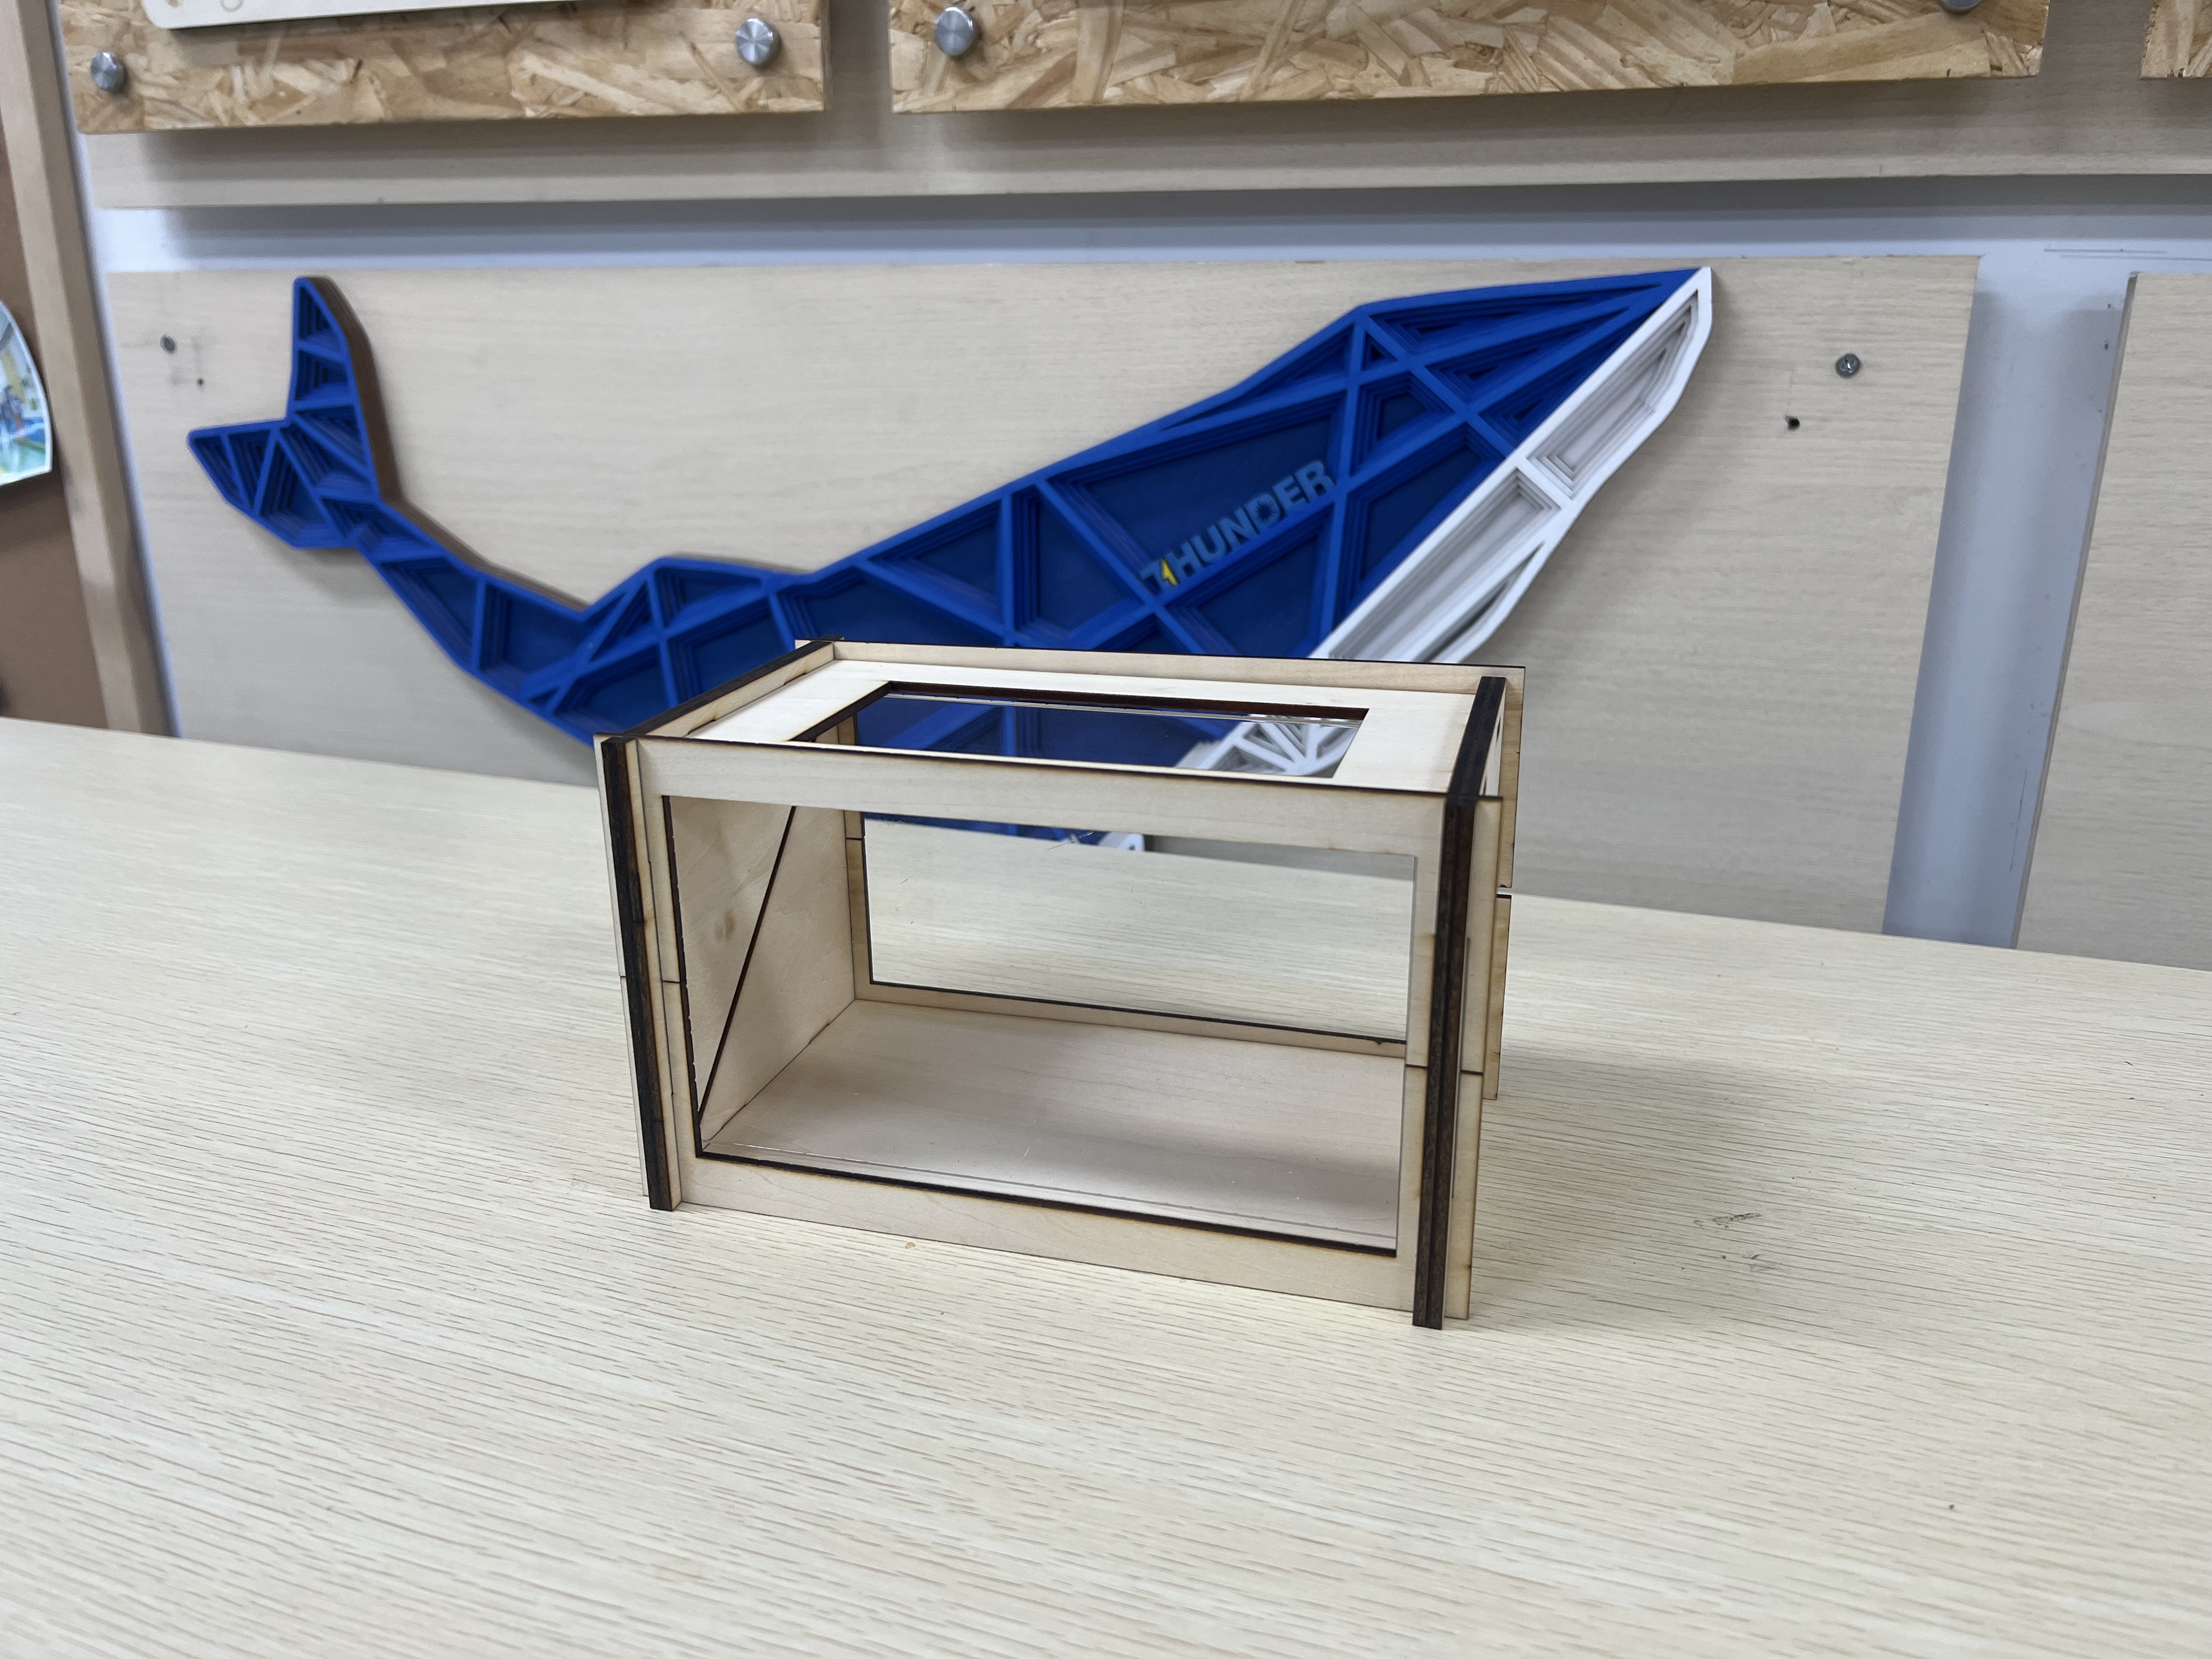
Holographic projection box
Basic Parameters
process parameters
| Processing Technology | processed material | pattern | power(%) | speed(mm/s) | processing times |
|---|---|---|---|---|---|
| cutting | 3mmBasswood board | - | 99 | 18 | 1 |
| cutting | 3mmacrylic | - | 99 | 10 | 1 |
structural design
Double layered composite side panel
Design principle: The left and right side walls are composed of two laminated oak boards, the "inner layer" and the "outer layer"4The film.
Inner guide plate: Cutting with precision 45The angled groove is specifically designed to support acrylic reflector plates, ensuring zero optical angle error.
Outer sealing plate: Adopting a complete solid panel, covering the outer side of the inner layer to prevent the acrylic from slipping out, while enhancing the side support strength.
Technological advantages: By stacking naturally to form embedded slides, complex 3D carving on single-layer wooden boards is avoided.

Mortise and tenon horizontal support
Top bearing plate: That is, the hollow rectangular frame in the drawing. It is both a platform for placing mobile phones and an entrance to the light path. The size of the central light hole has been optimized to be slightly smaller than the phone screen to block stray light.
Bottom base plate: The solid rectangular plate in the drawing. As a stable center of gravity for the chassis, it provides a dark background to enhance projection contrast.
Connection method: The edges of the two horizontal plates are reserved with protruding tenons, which are precisely matched with the slots on the side plates to preliminarily shape the box frame.

UType exoskeleton lock buckle
Core highlights: This is the soul component of this design (as shown in the drawings)UType parts).
Locking mechanism: adopt External envelope The way. After the main framework is assembled, use two UType fixed frame Insert from the top and bottom respectively, and use laser cutting interference fit to firmly press the left and right side panels inward like a "clamp".
Function: Thoroughly lock all mortise and tenon joints, instantly transforming loose parts into a sturdy whole, achieving adhesive free assembly of the entire structure.

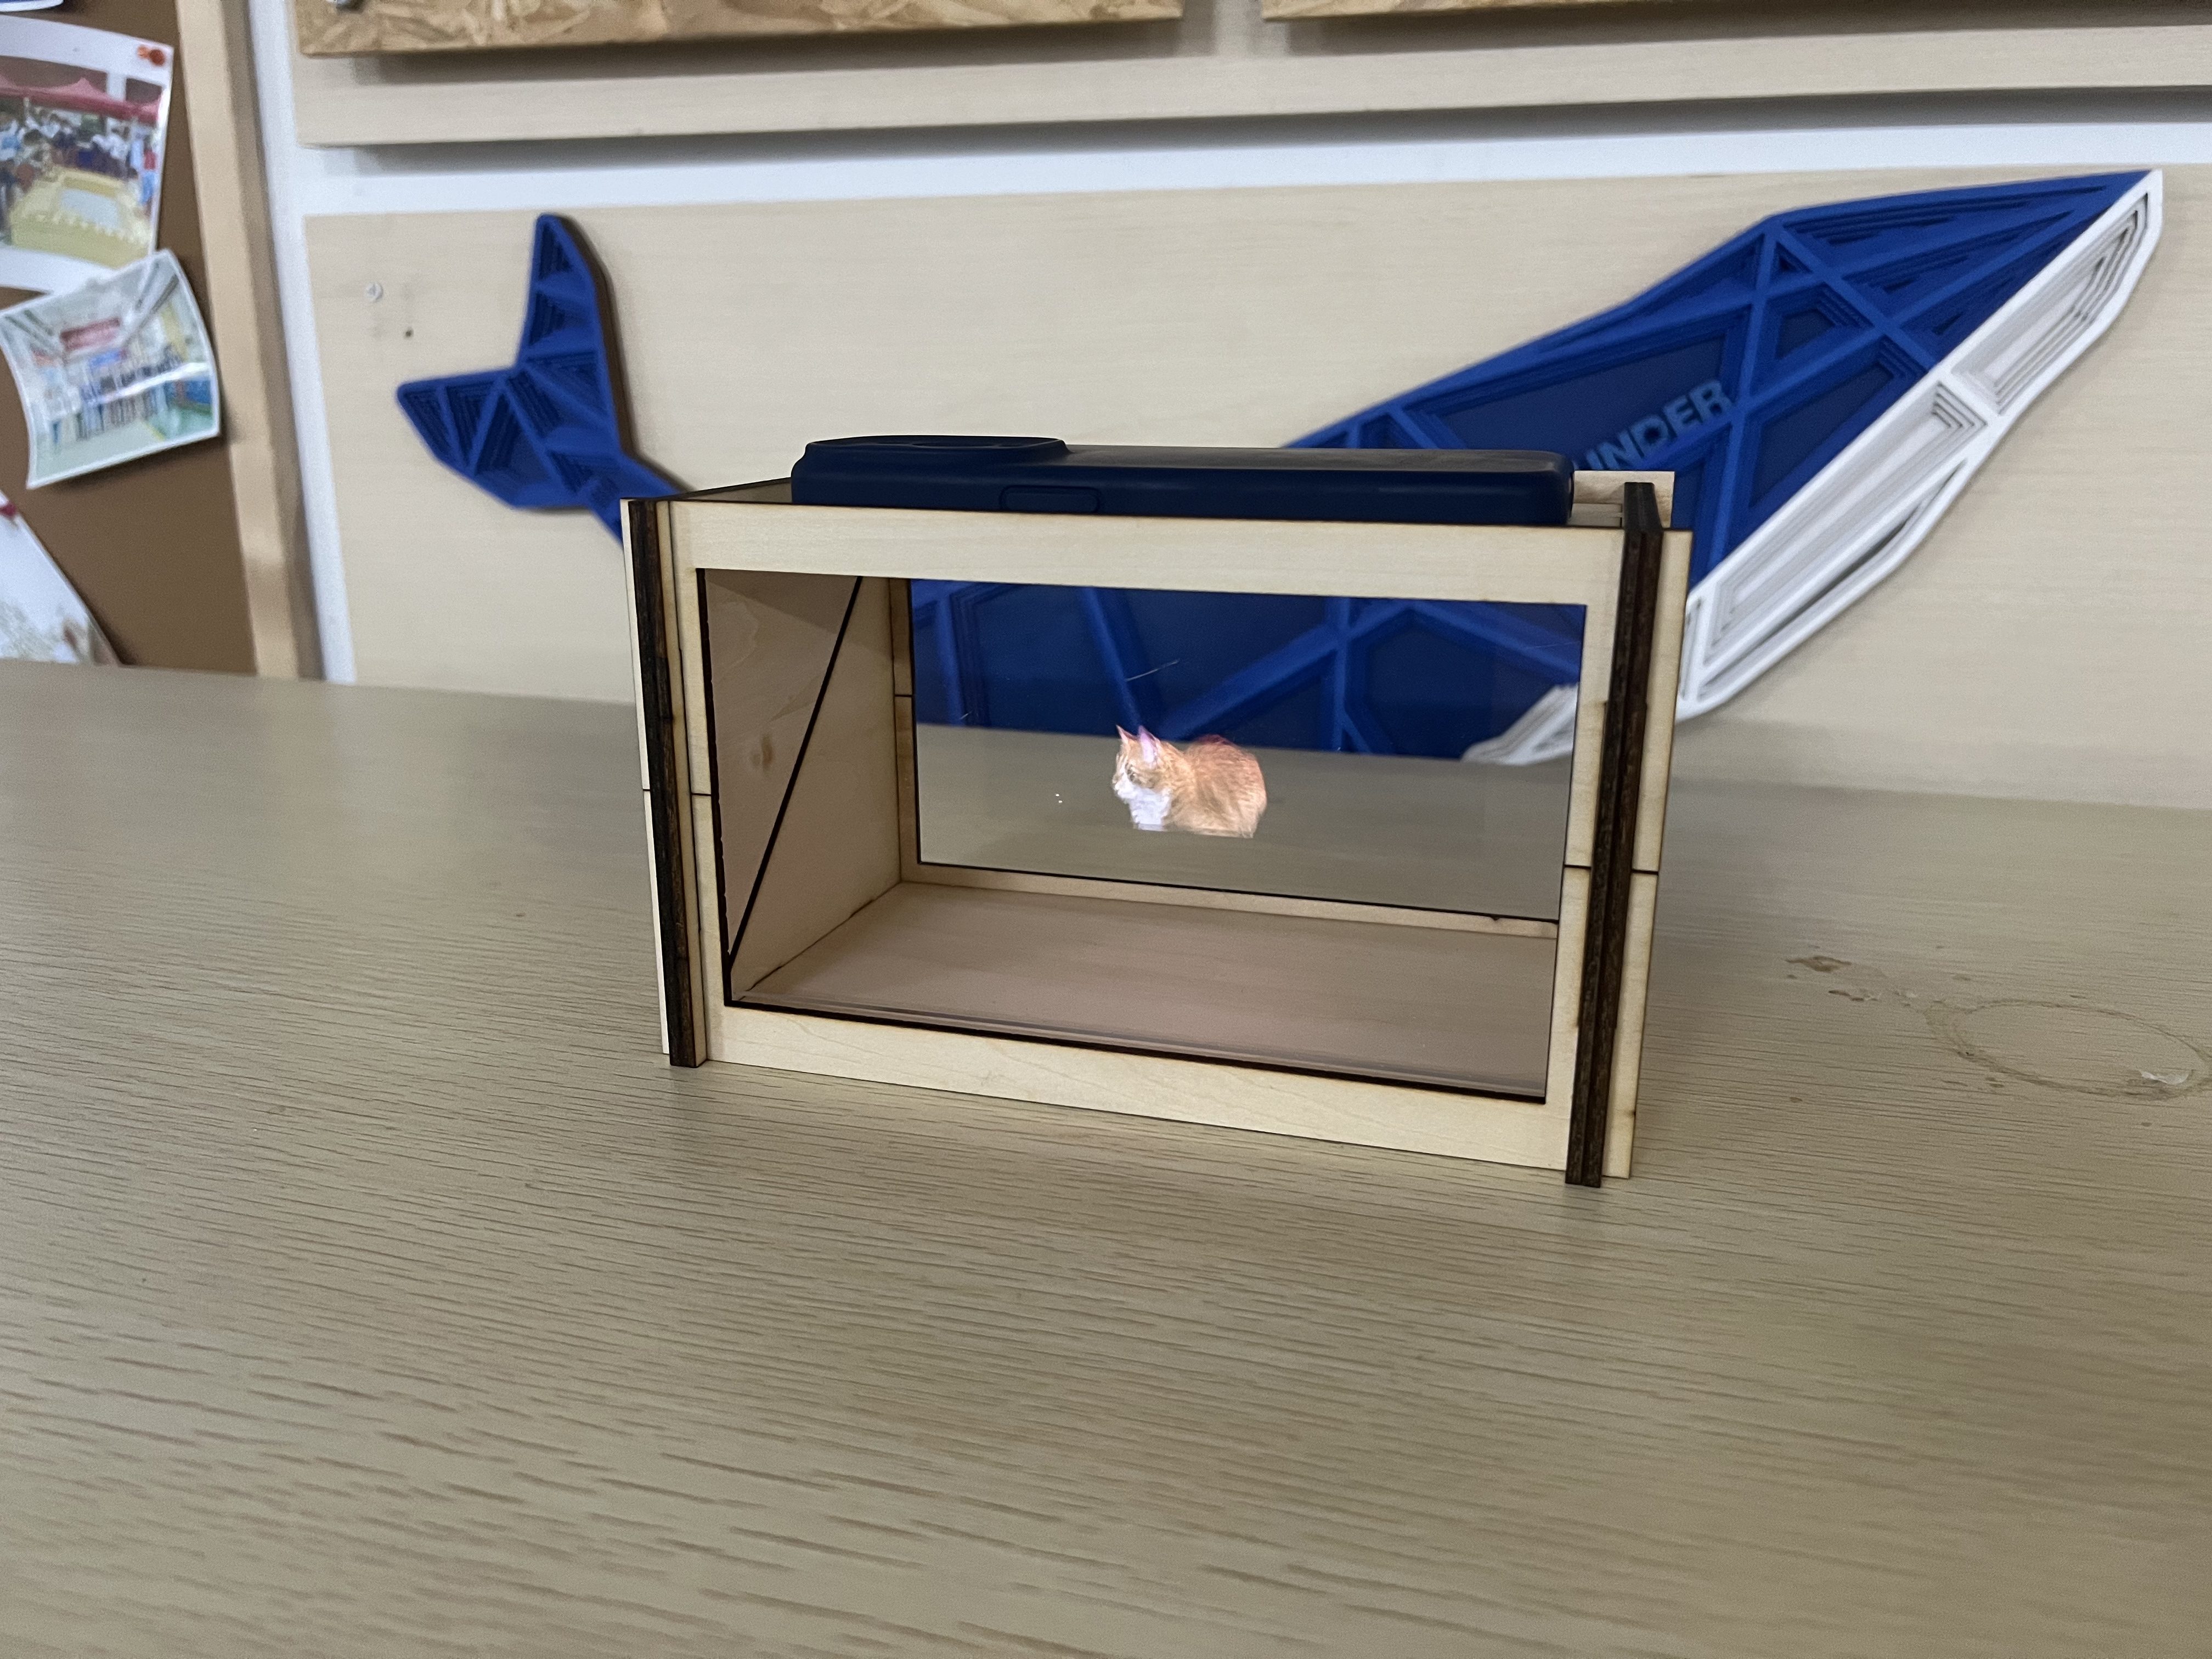
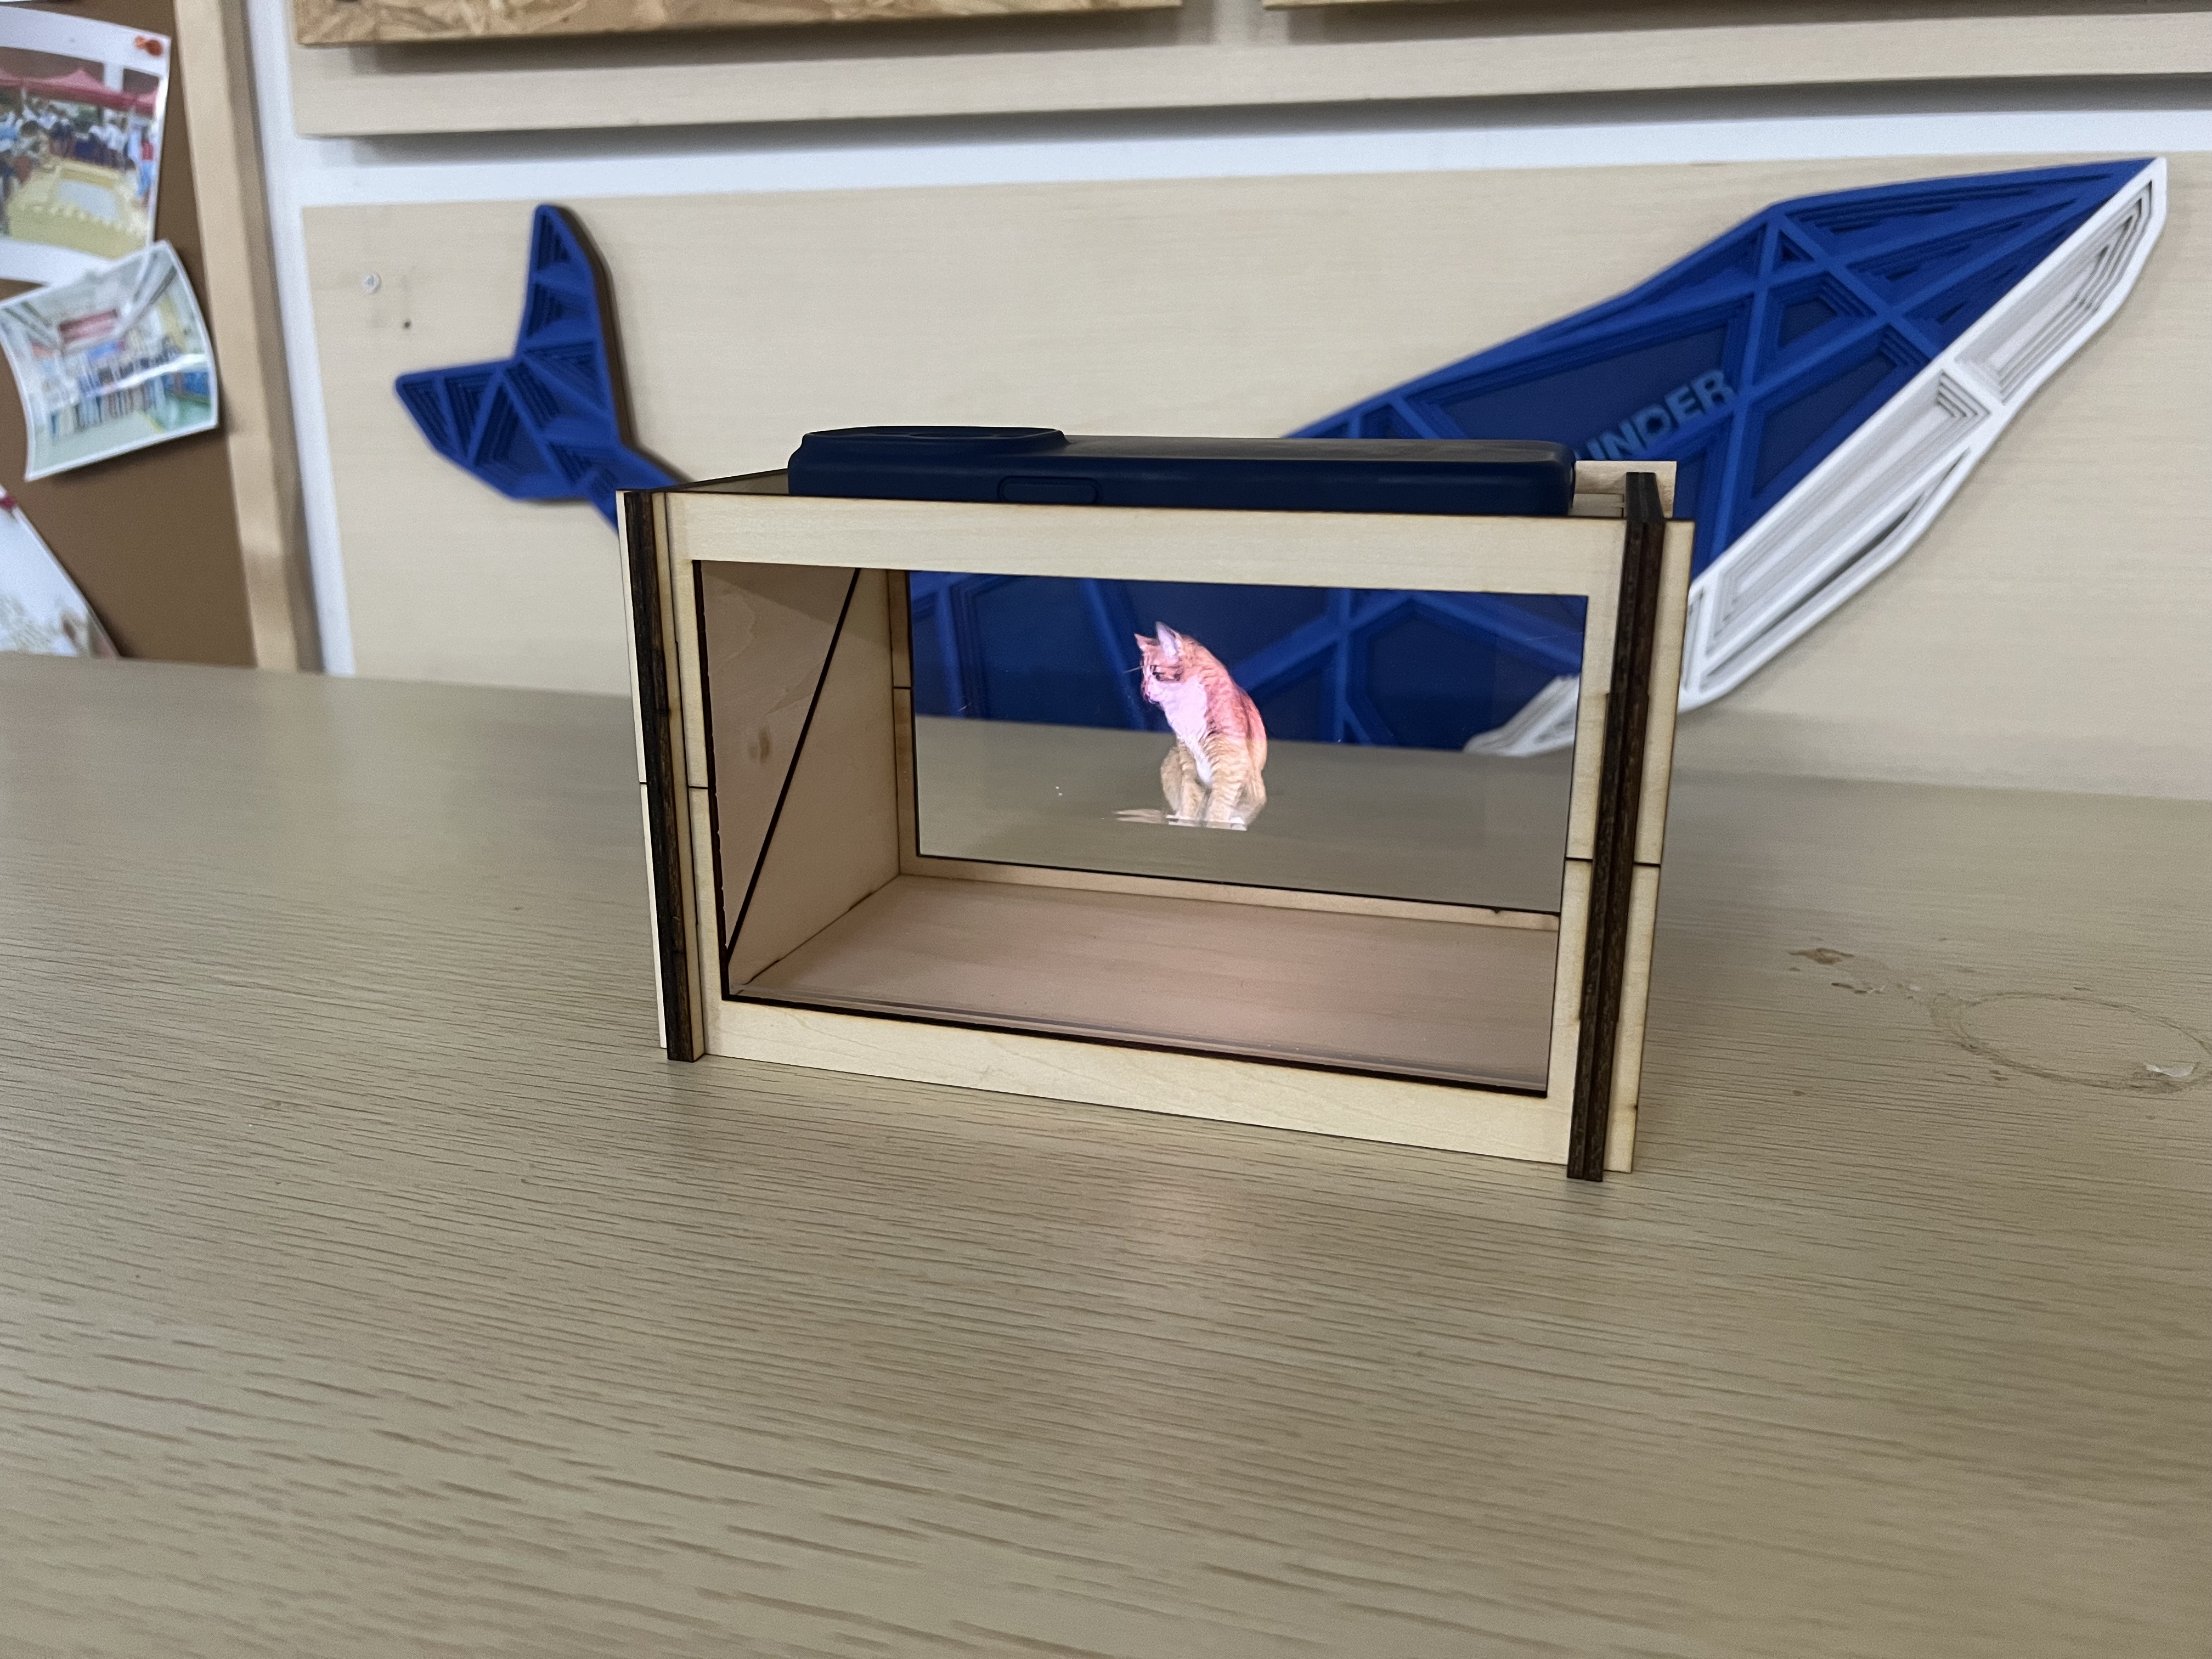
Suspended optical path system
Single piece reflection: A rectangular high transparency acrylic board, following the side panel45The inclined groove slides in and is stably suspended in the center of the box.
Optical path logic: Mobile screen (horizontal) → Light is projected downwards → 45Acrylic (reflective) → The human eye (when viewed horizontally) forms a virtual image located directly behind the box, creating a floating illusion.

Production steps
Step 1: Material Preparation and Pre processing
1.Laser cutting: use3mmCut all wooden parts from the oak board; use2mm-3mmCut the transparent acrylic to create a reflective board (the size should match the length of the inner layer board's groove).
2.Defooking and film tearing: Polish the burnt marks on the wooden board cut with sandpaper; Tear off the protective film on the acrylic surface (this is the easiest step to forget!).


Step 2: Assemble the side sandwich
take out 1Inner layer board (with inclined groove) and 1Outer layer board (solid).
Align and stack them to form a thick set of side brackets.
Repeat this step to create two sets of left and right side brackets.
Attention: At this point, ensure that the inclined slots of the two sets of brackets are facing each other, like a“V”Character shape (or inverted)V)So that it can be placed in acrylic.

Step 3: Build the main framework
Insert acrylic: Follow the acrylic board along the inside of the two sets of side brackets45The inclined groove slides in, and the acrylic is firmly "sandwiched" in the middle.
Install the horizontal plate:
Translate into English Top bearing plate Insert the protruding ear into the reserved slot on the top of the side panel.
Translate into English Bottom base plate Insert the protruding ear into the reserved slot at the bottom of the side panel.
At this point, you will receive a loose box structure.


Step 4:UType lock reinforcement
Bottom locking: Pick up one UA fixed frame that covers the bottom of the side panel from bottom to top. Make sure it fits into the groove of the side panel and clamps the left and right side panels inward like a clip.
Top Lock: Pick up another one UA fixed frame that covers the top of the side panel from top to bottom.
Complete When twoUAfter the frame is installed in place, you will find that the entire structure instantly becomes motionless and very sturdy.

Step 5: Projection Test
Place the phone: Turn the phone screen to its brightest and play holographic video material (with a black background).
Alignment: Flip the phone upside down onto the top light hole, observe from the side, and adjust the position of the phone until the image is perfectly suspended in the center of the acrylic.

Related Recommendations
comment (2)
-
copyright
open source licenseCC-BY-NCProhibit commercial use; -
Business License
Further information

Madame Curie
2026-2-8 11:53
Open it and there's nothing
admin
2026-2-9 08:50
usedLaserMakerOpen it? What version