 English
 简体中文
简体中文
 繁體中文
繁體中文
 Français
 Español
 عربي ،
 русский язык
 Português
 Deutsch

drawing
Instant payment to Year of the Horse multifunctional calendar pen holder design project

Drawing Information
Drawing video
Drawing Description
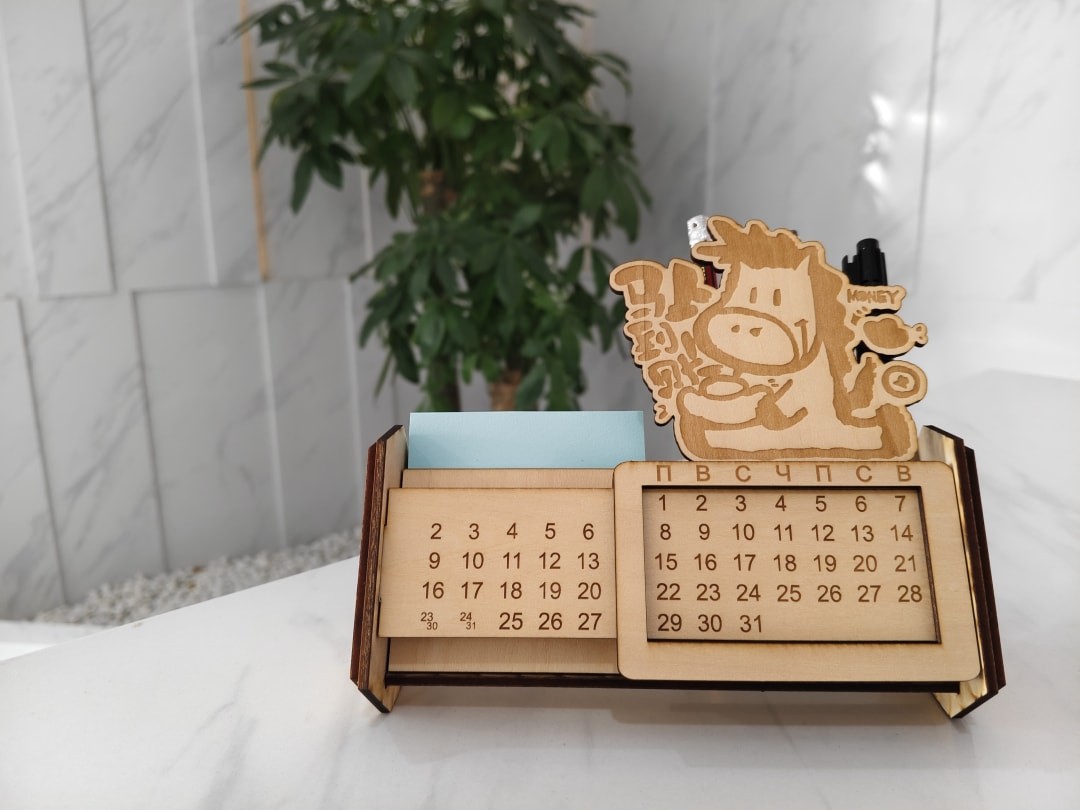
Multi functional creative calendar pen holder 🐴 The payment is coming soon, good luck in the Year of the Horse! This uniquely designed calendar pen holder combines practicality and creativity, featuring a Huadong date card that clearly marks dates, helping you efficiently plan every day. The thoughtful design of the side pen slot makes it easy to store various stationery items, and the desktop is tidy and orderly. The style is simple and fashionable, whether it is a desk, study or living room corner, it can become a eye-catching decoration. Personal use showcases taste, gift giving symbolizes auspiciousness, accompanying you to achieve success in your career during the Year of the Horse, and time is immediately grasped!
This work belongs to the category of secondary creative works, and the original drawing paper is from a designer on the forum. Thank you for sharing.
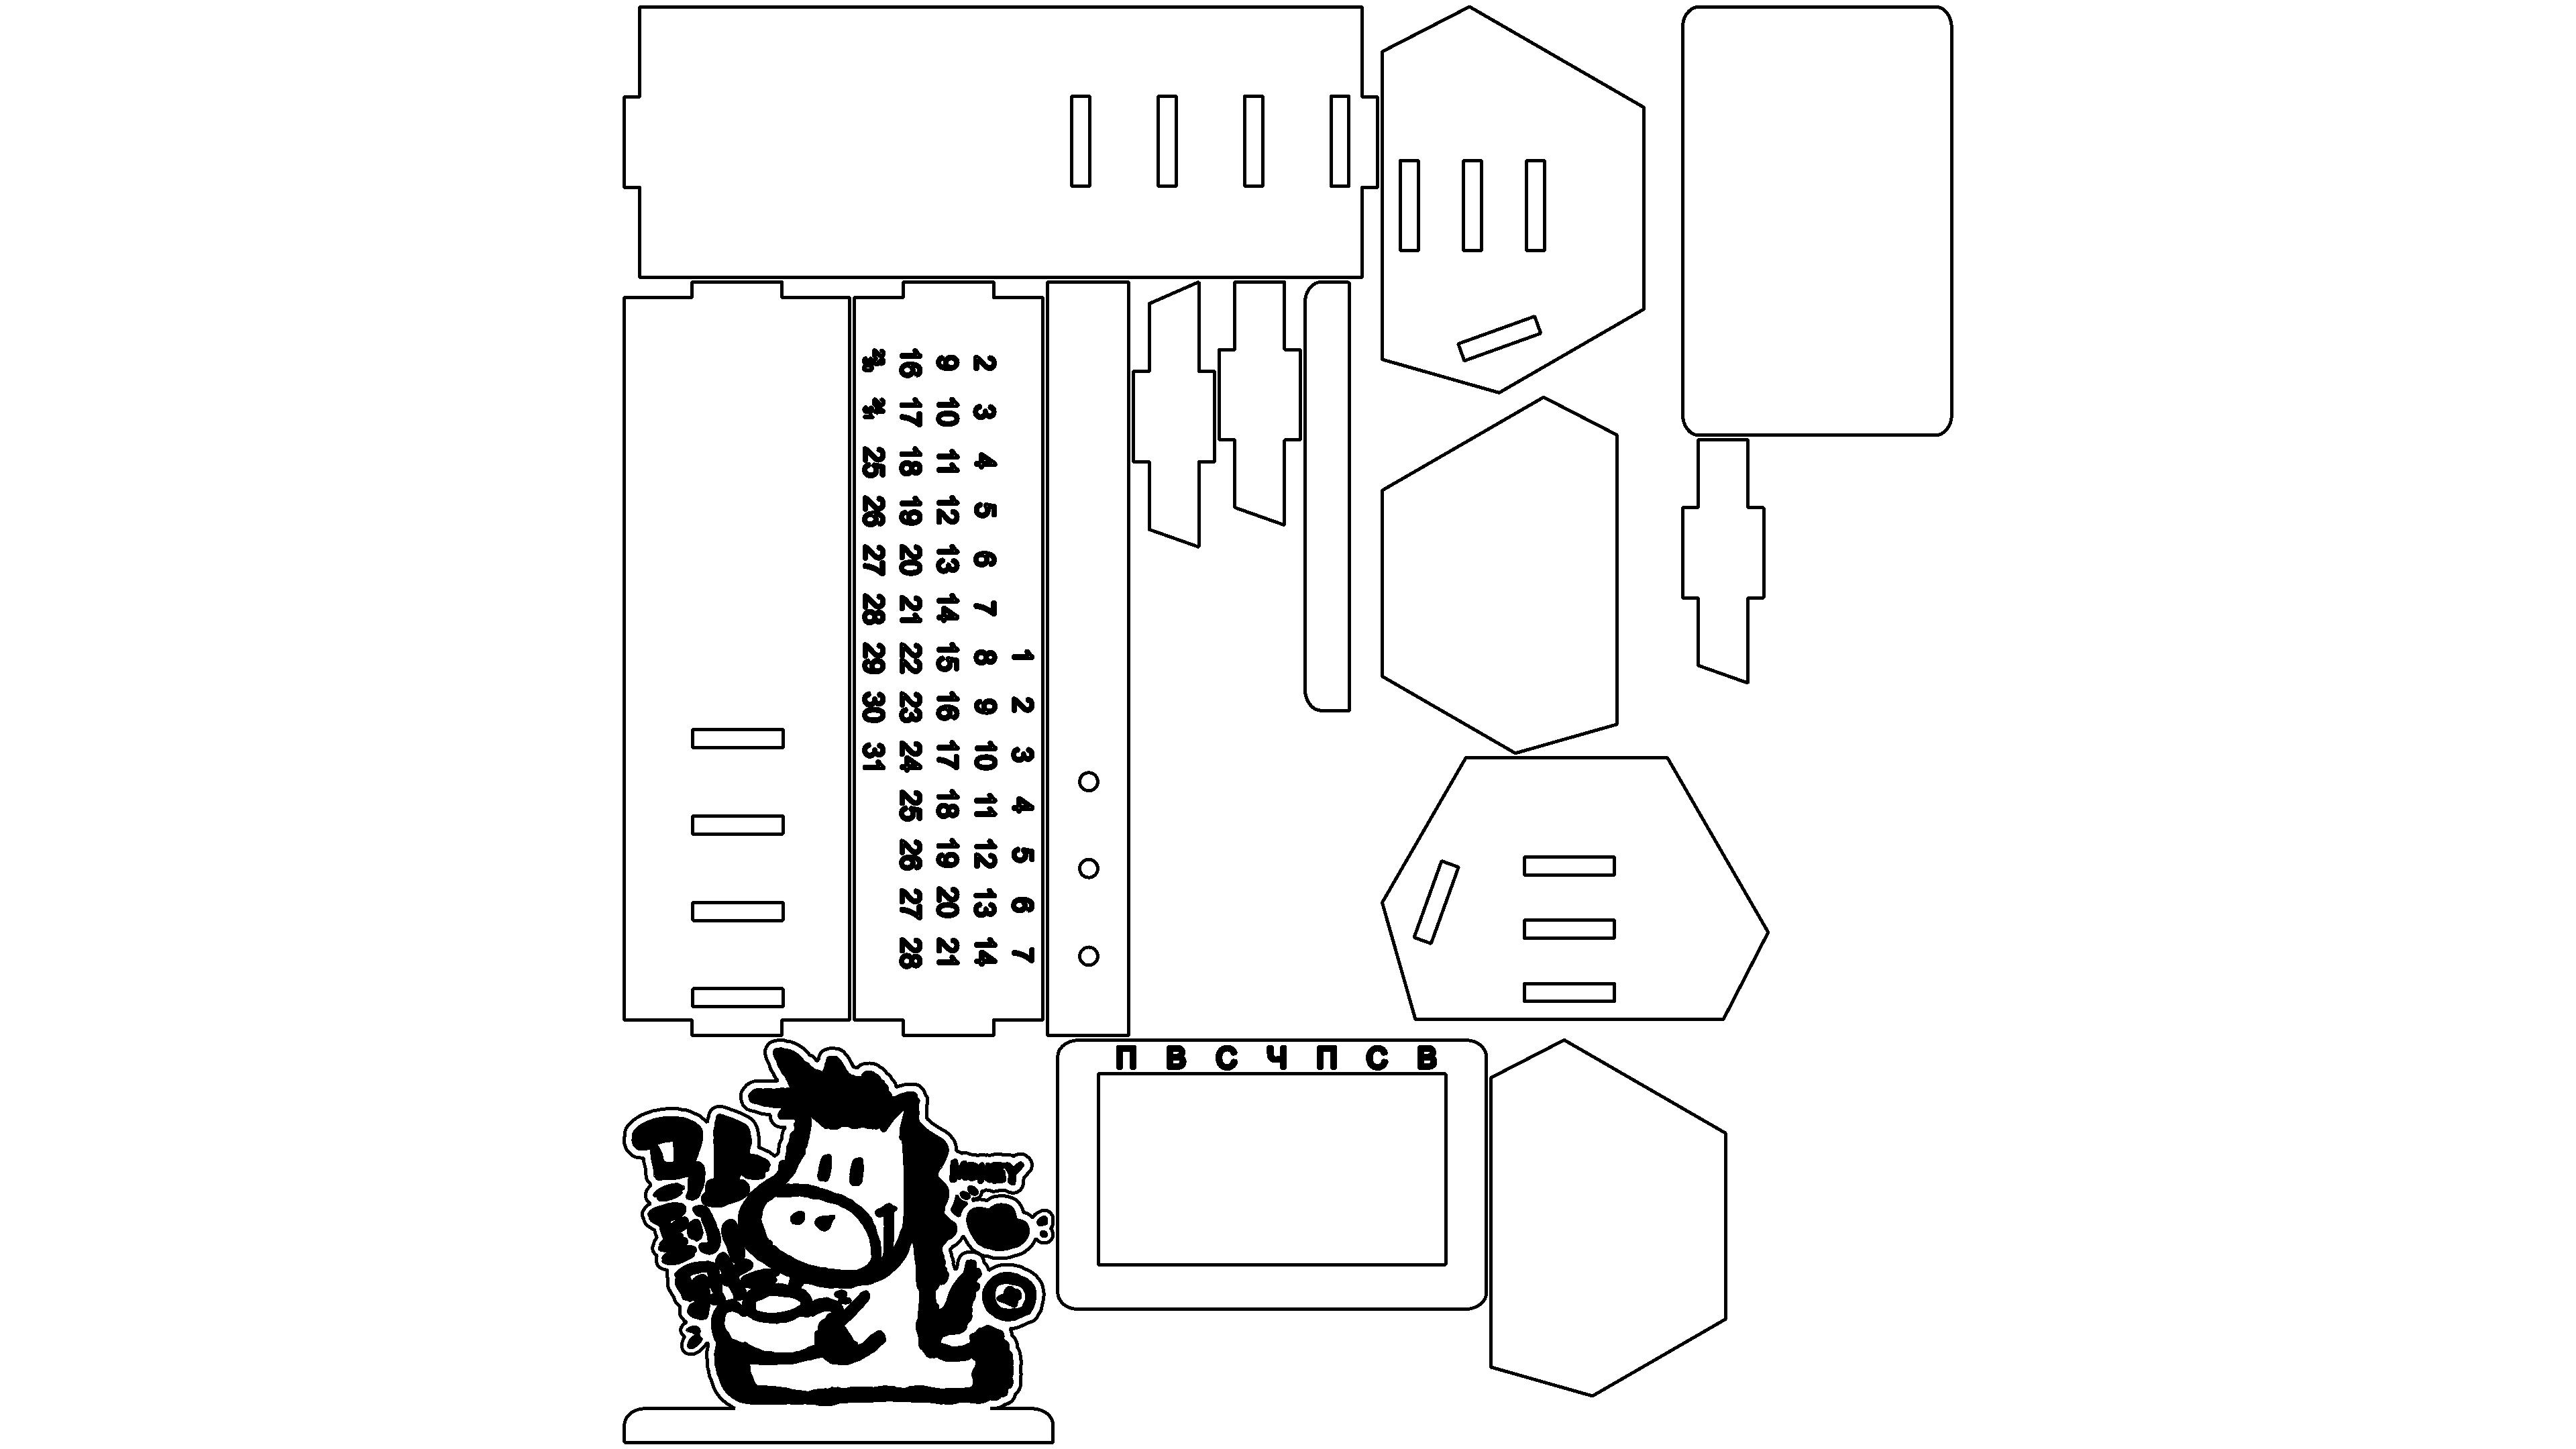
drawing documents
Immediately credited to the account
Basic Parameters
process parameters
| Processing Technology | processed material | pattern | power(%) | speed(mm/s) | processing times |
|---|---|---|---|---|---|
| Shallow carving | 3mmBasswood board | Horizontal bidirectional | 50 | 1000 | 1 |
| cutting | 3mmBasswood board | Horizontal unidirectional | 75 | 15 | 1 |
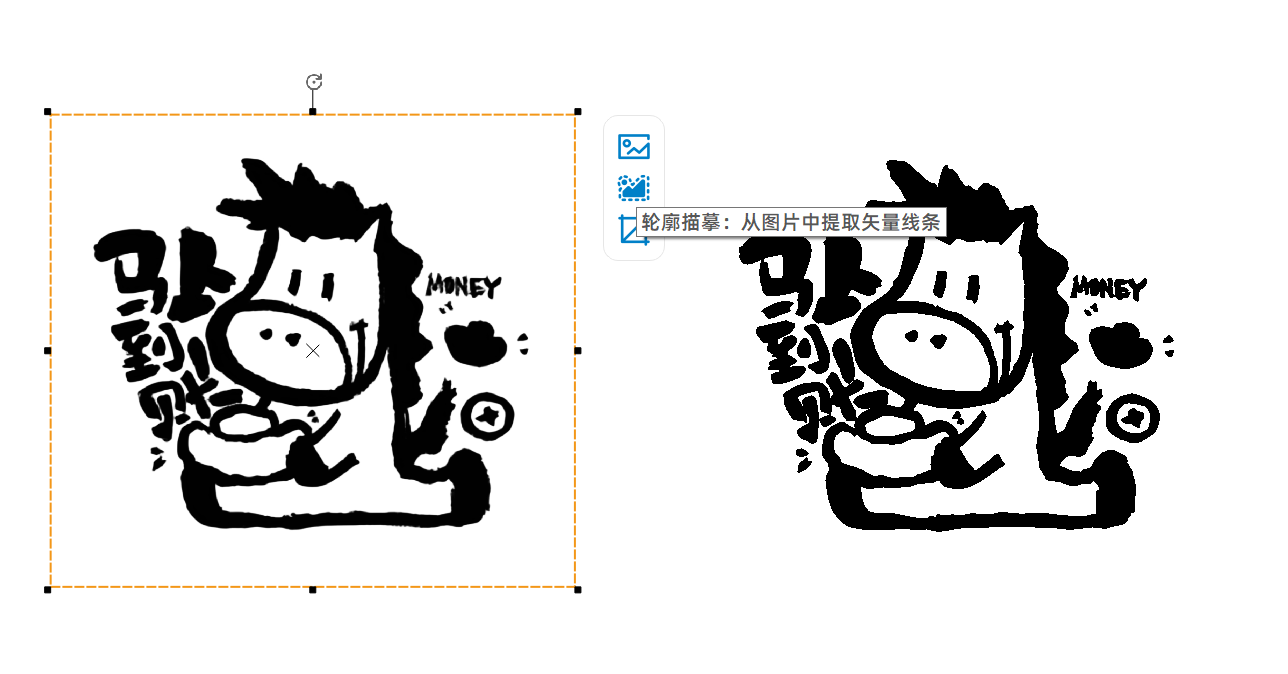
Find materials and throw them awayAI
Firstly, find your favorite material images on the internet and throw them backwardsAIInside, you can get a similar image.

useLaserMakerContour tracing function
Choose a material that you like, and thenLaserMakerOpen it and use contour tracing to obtain the shape we want
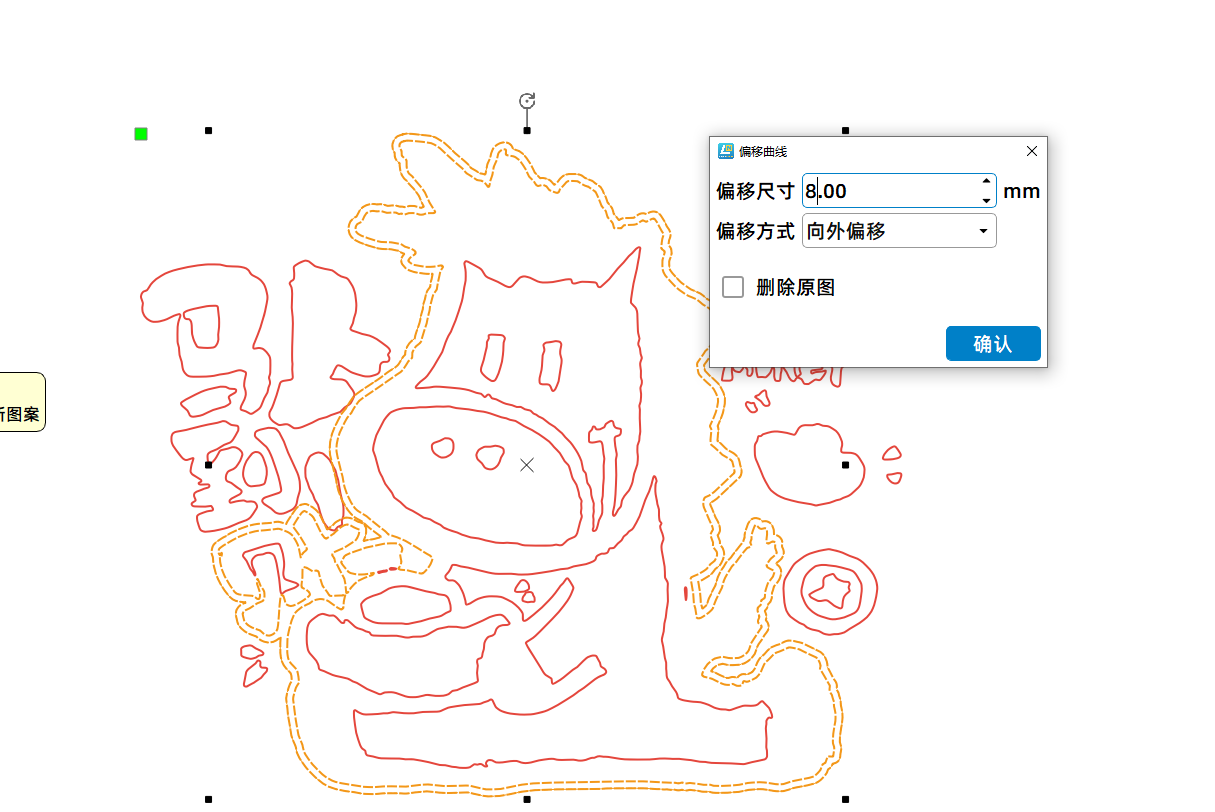
Create cutting borders
Use offset curves and union tools to create a cutting border for the shape. This step needs to be repeated multiple times because there are many independent images. Through multiple offset curves and union tools, an outer frame can be added to the entire element.
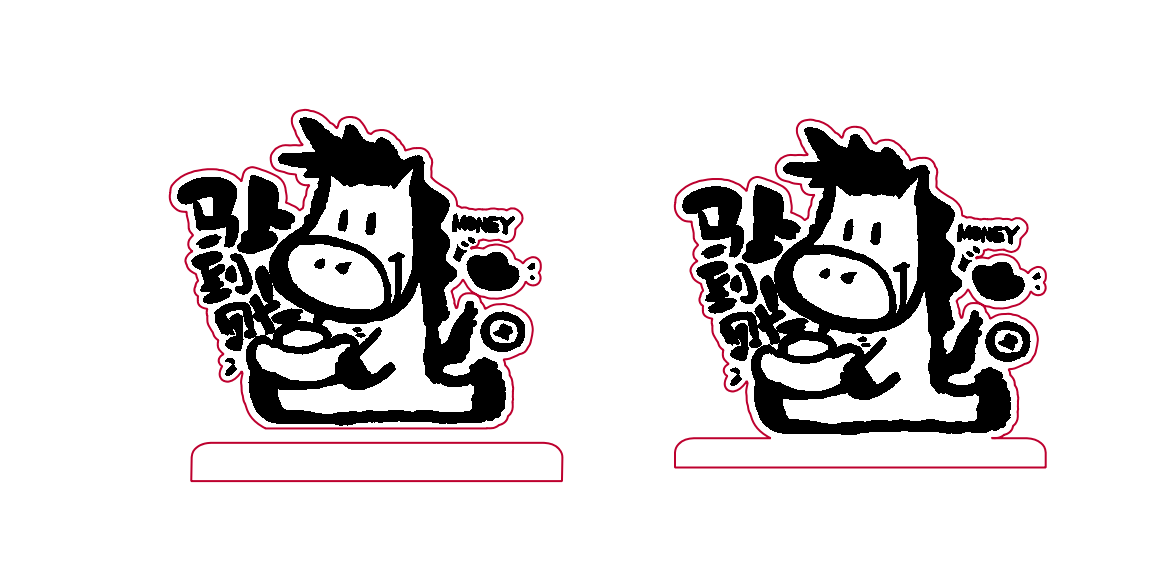
Merge border bars
Use the merge tool to merge a note with the original drawing. Get the part we need.
Processing, process skipped

Installation steps: Side cover
first2Stick the side cover on, I used hot melt adhesive


Installation steps: "Instant payment" border
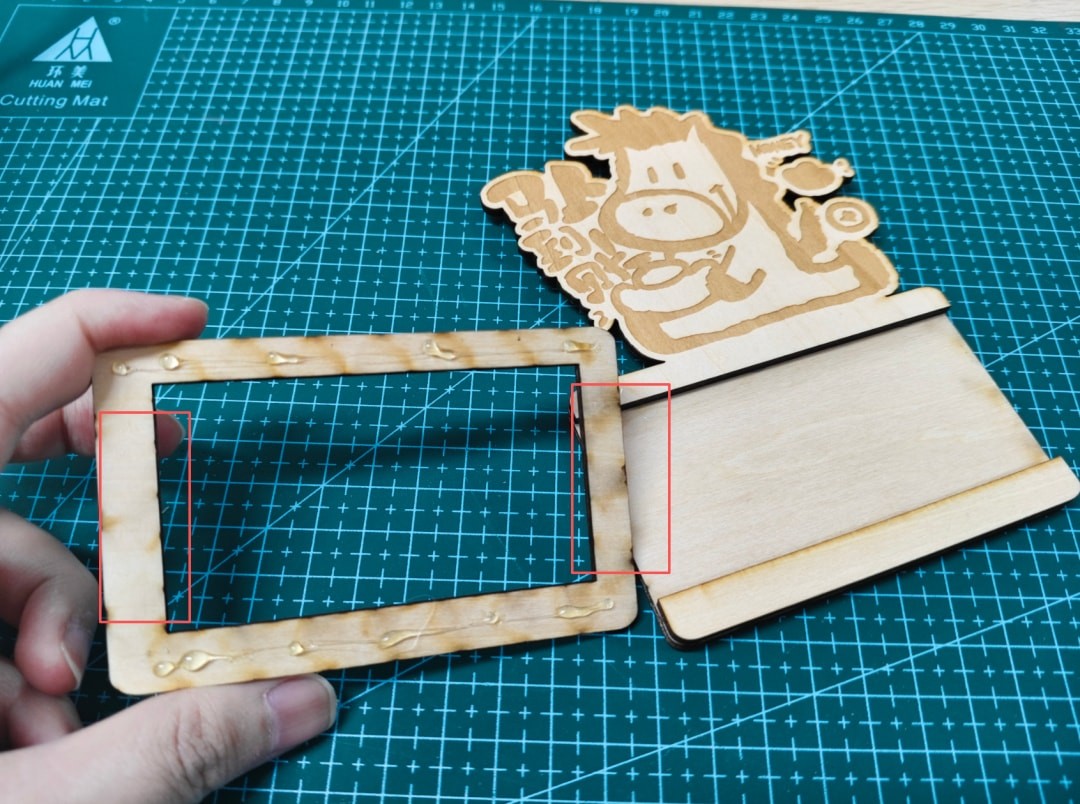
When installing the frame, remember not to apply glue on both sides of the front frame, otherwise the date bar at the back cannot be inserted.

Installation steps: Main body and support
Take out a side cover and first place it in the middle2There is a long wooden strip4Install the hole position, install the wide and long wooden strip in the middle, and then proceed with installation3A card spacing component (similar to the logo of a certain brand of car) is installed, followed by a small wooden strip with three circular holes. Finally, install the wooden strip with the number in front and fix it with hot melt adhesive. Finally, stick a sealing plate behind the card gap(rectangle).


Installation steps: Install the slider frame and seal
Finally, install the slider frame and another side cover, and the work is completed.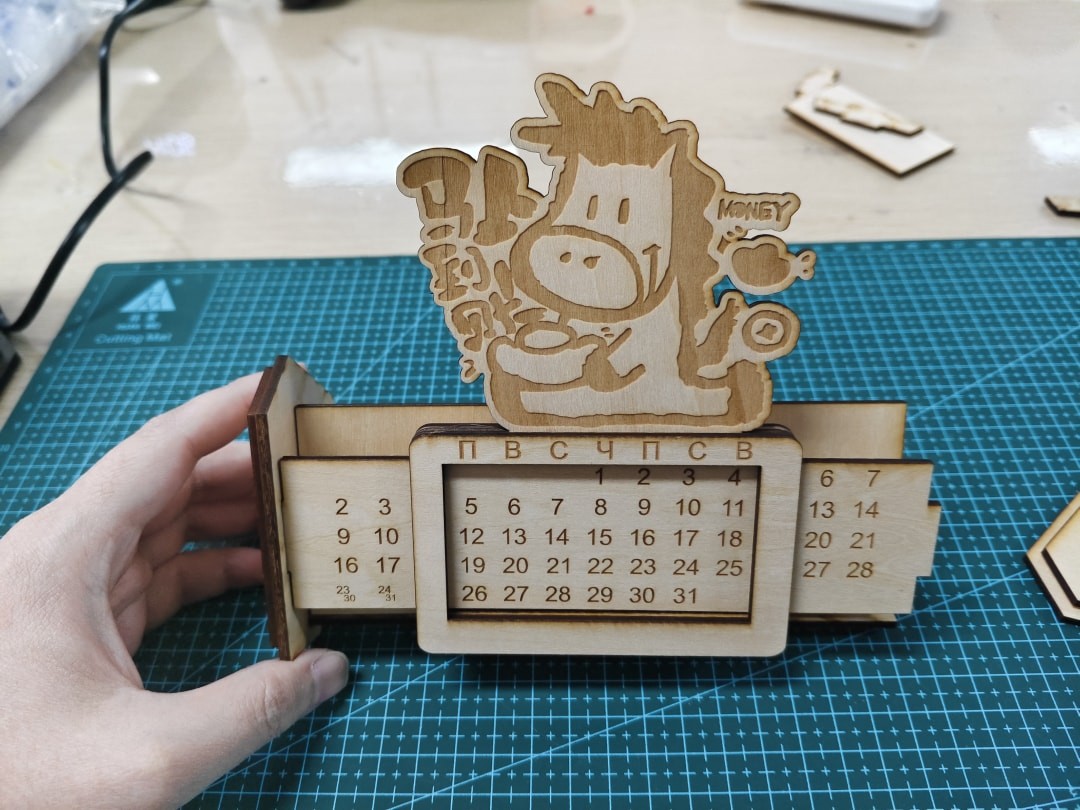
comment (5)
-
classification
Spring Festival -
copyright
open source licenseCC-BY-NCProhibit commercial use; -
Business License
Further information

There are two treasures at home
2026-1-26 09:57
A pretty good piece of work
Gareth.T
2026-1-29 16:16
Welcome to reprint, return to image
WeChat users_89
2026-1-27 07:23
A pretty good piece of work
Gareth.T
2026-1-29 16:16
Welcome to reprint, return to image
Alcohol block_4795
2026-2-3 11:15
not bad